ボタンや、表といったものは、Phaserでは用意していないのでHTMLを追加することになります。
例えば、タイトル画面でゲーム開始ボタンを用意し、ゲーム画面に遷移するとします。
button要素一つ追加する例
DOMを追加する場合、configに dom : { createContainer : true } を追加する必要があります。
./src/main.js
import { AUTO, Scale, Game } from 'phaser';
import GameScene from './scenes/GameScene';
import TitleScene from './scenes/TitleScene';

//  Find out more information about the Game Config at:
//  https://newdocs.phaser.io/docs/3.70.0/Phaser.Types.Core.GameConfig
const config = {
    type: AUTO,
    width: 960,
    height: 540,
    parent: 'game-container',
    backgroundColor: '#FFF',
    scale: {
        mode: Phaser.Scale.FIT,
        autoCenter: Phaser.Scale.CENTER_BOTH
    },
    scene: [
        TitleScene,
        GameScene
    ],
    dom: {
        createContainer: true
    },
};

export default new Game(config);
./src/scenes/TitleScene.js
import { Scene } from 'phaser';

export default class TitleScene extends Scene {
    constructor() {
        super('TitleScene');
    }

    preload() {
    }

    create() {
        const centerX = this.scale.width / 2;
        const centerY = this.scale.height / 2;

        const btnStartNode = document.createElement("button");
        btnStartNode.className = "btnStart btnStart--royalblue";
        btnStartNode.innerText = "ゲーム開始";
        btnStartNode.addEventListener("click", () => { this.scene.start("GameScene"); });

        const btnStart = this.add.dom(centerX, centerY, btnStartNode);
    }

    update() {
    }
}
./src/scenes/GameScene.js
import { Scene } from 'phaser';

export default class GameScene extends Scene {
    constructor() {
        super('GameScene');
    }

    preload() {
    }

    create() {
    }

    update() {
    }
}
./public/phaser.css
.btnStart {
    border: none;
    border-radius: 5px;
    color: white;
    font-size: 200%;
    padding: 10px 30px;
    text-align: center;
}

.btnStart--royalblue{
    background-color: royalblue;
    border-bottom: 5px solid rgb(48, 66, 133);
}

.btnStart--royalblue:hover {
    background: rgb(85, 125, 245);
    border-bottom: 2px solid rgb(48, 66, 133);
    margin-top: 2px;
}
DOMを追加しているので、イベントは通常のaddEventListenerで追加する。
追加した要素は、画面遷移とともに、消えています。
DOMを追加しているので、イベントは通常のaddEventListenerで追加する。
追加した要素は、画面遷移とともに、消えています。
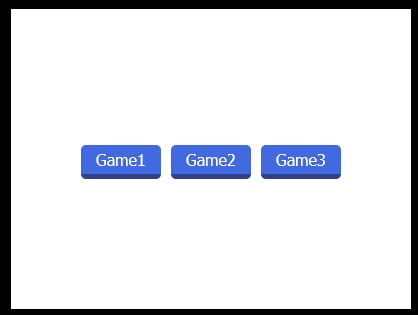
タイトル画面で、ゲームの種類を選択して画面遷移させたい場合など、複数の同一のボタンを用意したい場合
複数のボタンを追加する例
今度は、ボタンのクラスを作って配置してみます。
./src/main.js
import { Scene } from 'phaser';
import GameTypeButton from '../objects/GameTypeButton'

export default class TitleScene extends Scene {
    constructor() {
        super('TitleScene');
    }

    preload() {
    }

    create() {
        const centerX = this.scale.width / 2;
        const centerY = this.scale.height / 2;

        new GameTypeButton(this, centerX - 90, centerY, "Game1", () => { this.scene.start("GameScene"); });
        new GameTypeButton(this, centerX + 0, centerY, "Game2", () => { this.scene.start("GameScene2"); });
        new GameTypeButton(this, centerX + 90, centerY, "Game3", () => { this.scene.start("GameScene3"); });
    }

    update() {
    }
}
./scenes/TitleScene.js
import { Scene } from 'phaser';
import GameTypeButton from '../objects/GameTypeButton'

export default class TitleScene extends Scene {
    constructor() {
        super('TitleScene');
    }

    preload() {
    }

    create() {
        const centerX = this.scale.width / 2;
        const centerY = this.scale.height / 2;

        new GameTypeButton(this, centerX - 90, centerY, "Game1", () => { this.scene.start("GameScene"); });
        new GameTypeButton(this, centerX + 0, centerY, "Game2", () => { this.scene.start("GameScene2"); });
        new GameTypeButton(this, centerX + 90, centerY, "Game3", () => { this.scene.start("GameScene3"); });
    }

    update() {
    }
}
DOMを追加するクラスは、Phaser.GameObjects.DOMElementを継承します。
ここでは、親クラスには、scene, x, y, HTML要素を渡しています。
./src/objects/GameTypeButton.js
export default class GameTypeButton extends Phaser.GameObjects.DOMElement {
    constructor(scene, x, y, text, callback) {
        // HTML要素を作成
        const element = document.createElement('button');
        element.innerText = text;
        element.className = "btnStart btnStart--royalblue";

        super(scene, x, y, element);

        // シーンに追加
        scene.add.existing(this);

        // ボタンクリック時のコールバックを設定
        this.node.addEventListener('click', callback);
    }
}
./public/phaser.css
.btnStart {
    border: none;
    border-radius: 5px;
    color: white;
    font-size: 100%;
    padding: 5px 15px;
    text-align: center;
}

.btnStart--royalblue{
    background-color: royalblue;
    border-bottom: 5px solid rgb(48, 66, 133);
}

.btnStart--royalblue:hover {
    background: rgb(85, 125, 245);
    border-bottom: 2px solid rgb(48, 66, 133);
    margin-top: 2px;
}
./srcscenes/GameScene.js
import { Scene } from 'phaser';

export default class GameScene extends Scene {
    constructor() {
        super('GameScene');
    }

    preload() {
    }

    create() {
    }

    update() {
    }
}
./srcscenes/GameScene2.js
import { Scene } from 'phaser';

export default class GameScene2 extends Scene {
    constructor() {
        super('GameScene2');
    }

    preload() {
    }

    create() {
    }

    update() {
    }
}
./srcscenes/GameScene3.js
import { Scene } from 'phaser';

export default class GameScene3 extends Scene {
    constructor() {
        super('GameScene3');
    }

    preload() {
    }

    create() {
    }

    update() {
    }
}
それぞれクリックすると、画面遷移します。
大した、Styleじゃないので、CSSファイルにわけるのではなく、ソースとStyle一か所でまとめて管理したいというのであれば・・・
親クラスにStyleも渡す場合
cssに記載していた内容をクラス内にまとめるとすると・・・
./src/objects/GameTypeButton.js
export default class GameTypeButton extends Phaser.GameObjects.DOMElement {
    constructor(scene, x, y, text, callback) {

        const style = {
            backgroundColor: "royalblue",
            border: "none",
            borderBottom: "5px solid rgb(48, 66, 133)",
            borderRadius: "5px",
            color: "white",
            fontSize: "100%",
            marginTop: "0px",
            padding: "5px 15px",
            textAlign: "center",
        };

        super(scene, x, y, "button", style, text);

        this.setOrigin(0.5);
        scene.add.existing(this);

        // ボタンクリック時のコールバックを設定
        this.node.addEventListener('click', callback);

        // ホバー設定(over/outで代用)
        this.node.addEventListener('mouseover', () => {
            this.node.style.background = "rgb(85, 125, 245)";
            this.node.style.borderBottom = "2px solid rgb(48, 66, 133)";
            this.node.style.marginTop = "2px";
        });
        this.node.addEventListener('mouseout', () => {
            this.node.style.background = style.backgroundColor
            this.node.style.borderBottom = style.borderBottom;
            this.node.style.marginTop = style.marginTop;
        });
    }
}
ランキングのようなものとかなら、templateタグで用意しておいてゲーム画面外の要素として表示とかでよい気がする。