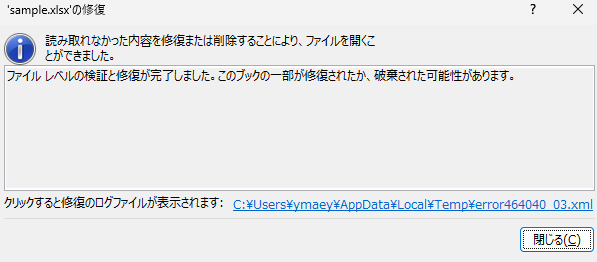
3つシートがあり、Sheet1とSheet2をIndexと名前を指定して削除してみます

ExcelVBA
Sub Sample()
    Dim BookObj     As Workbook
    Dim FilePath    As String

    'ファイルパス作成
    FilePath = ThisWorkbook.Path & "\sample.xlsx"

    'ブックを開く
    Set BookObj = Workbooks.Open(FilePath)


    Application.DisplayAlerts = False 'ダイアログ表示抑制

    'Index番号を指定して削除
    BookObj.Worksheets(1).Delete

    '名前を指定して削除
    BookObj.Sheets("Sheet2").Delete

    Application.DisplayAlerts = True 'ダイアログ表示抑制解除

    '閉じる
    BookObj.Save

    Set BookObj = Nothing
End Sub
Excel(COM)
using Microsoft.Office.Interop.Excel;
using System;
using System.IO;
using System.Reflection;
using System.Runtime.InteropServices;
using Excel = Microsoft.Office.Interop.Excel;

namespace SampleCode; // C#10~

internal class SampleExcel
{
    static void Main(string[] args)
    {
        Excel.Application? application = null;
        Excel.Workbooks? workbooks = null;
        Excel.Workbook? workbook = null;
        Excel.Sheets? worksheets = null;
        Excel.Worksheet? worksheet1 = null;
        Excel.Worksheet? worksheet2 = null;

        try
        {
            // 実行ファイルのあるフォルダパス取得
            var folderPath = Path.GetDirectoryName(Assembly.GetEntryAssembly()?.Location);
            if (folderPath == null) { return; }

            // Excelファイルパスを作成
            var filePath = Path.Combine(folderPath, "sample.xlsx");

            // Excelを開く
            application = new Excel.Application();
            application.Visible = true;

            // ブックを開く
            workbooks = application.Workbooks;
            workbook = workbooks.Open(filePath);

            // シートを取得
            worksheets = workbook.Sheets;

            application.DisplayAlerts = false; // ダイアログ表示抑制

            // Index番号で取得して削除
            worksheet1 = worksheets[1];
            worksheet1.Delete();

            // 名前で取得して削除
            worksheet2 = worksheets["Sheet2"];
            worksheet2.Delete();

            application.DisplayAlerts = true; // ダイアログ表示抑制解除

            // 保存
            workbook.Save();
        }
        catch (Exception ex)
        {
            Console.WriteLine(ex.Message);
        }
        finally
        {
            CleanUpComObject(ref worksheet1);
            CleanUpComObject(ref worksheet2);
            CleanUpComObject(ref worksheets);
            CleanUpComObject(ref workbook);
            CleanUpComObject(ref workbooks);
            CleanUpComObject(ref application);
        }
    }

    static void CleanUpComObject<T>(ref T comObject, bool shouldClose = true, bool saveChanges = false)
    {
        // フラグによってWorkbookはClose / ApplicationはQuitする
        if (shouldClose && comObject != null)
        {
            // 型をチェックする
            if (comObject is Microsoft.Office.Interop.Excel.Workbook workbook)
            {
                // Workbookの場合
                workbook.Close(saveChanges);
            }
            else if (comObject is Microsoft.Office.Interop.Excel.Application application)
            {
                // Applicationの場合
                application.Quit();
            }
        }

        // Objectを解放
        if (comObject != null && Marshal.IsComObject(comObject))
        {
            Marshal.ReleaseComObject(comObject);
            comObject = default!;
        }
    }
}
補足:Microsoft.Office.Interop.Excel でオブジェクトの解放について
ClosedXML
using ClosedXML.Excel;
using System;
using System.IO;
using System.Reflection;

namespace SampleCode; // C#10~

internal class SampleClosedXML
{
    static void Main(string[] args)
    {
        try
        {
            // 実行ファイルのあるフォルダパス取得
            var folderPath = Path.GetDirectoryName(Assembly.GetEntryAssembly()?.Location);
            if (folderPath == null) { return; }

            // Excelファイルパスを作成
            var filePath = Path.Combine(folderPath, "sample.xlsx");

            // ブックを開く、読み書きモード、共有なし(排他)
            using (var fileStream = new FileStream(filePath, FileMode.Open, FileAccess.ReadWrite, FileShare.None))
            using (var workbook = new XLWorkbook(fileStream))
            {
                // Index番号で取得して削除
                workbook.Worksheet(1).Delete();

                // 名前で取得して削除
                workbook.Worksheet("Sheet2").Delete();

                // 保存
                workbook.Save();
            }
        }
        catch (Exception ex)
        {
            Console.WriteLine(ex.Message);
        }
    }
}
EPPlus
using OfficeOpenXml;
using System;
using System.IO;
using System.Reflection;

namespace SampleCode; // C#10~

internal class SampleEPPlus
{
    static void Main(string[] args)
    {
        // Ver8.0のソースです
        // 非商用個人利用の場合 名前を設定
        ExcelPackage.License.SetNonCommercialPersonal("SampleTarou");

        try
        {
            // 実行ファイルのあるフォルダパス取得
            var folderPath = Path.GetDirectoryName(Assembly.GetEntryAssembly()?.Location);
            if (folderPath == null) { return; }

            // Excelファイルパスを作成
            var filePath = Path.Combine(folderPath, "sample.xlsx");

            // メモリにすべて取り込む。これなら遅延でStreamにアクセスするような問題が発生しない
            byte[] fileBytes = File.ReadAllBytes(filePath);
            using (var readStream = new MemoryStream(fileBytes))
            using (var package = new ExcelPackage(readStream))
            {
                // Index番号で取得して削除
                package.Workbook.Worksheets.Delete(0);

                // 名前で取得して削除
                package.Workbook.Worksheets.Delete("Sheet2");

                // あらためて書き込み用としてStreamを開く
                using (var writeStream = new FileStream(filePath, FileMode.Create, FileAccess.Write, FileShare.None))
                {
                    // 書き込み
                    package.SaveAs(writeStream);
                }
            }
        }
        catch (Exception ex)
        {
            Console.WriteLine($"エラー: {ex.Message}");
        }
    }
}
ExcelDataReader
読み取りのみのライブラリのためなし
NPOI
□xls
using NPOI.HSSF.UserModel;
using System;
using System.IO;
using System.Reflection;


namespace SampleCode; // C#10~

internal class SampleNPOI_xls
{
    static void Main(string[] args)
    {
        try
        {
            // 実行ファイルのあるフォルダパス取得
            var folderPath = Path.GetDirectoryName(Assembly.GetEntryAssembly()?.Location);
            if (folderPath == null) { return; }

            // Excelファイルパスを作成
            var filePath = Path.Combine(folderPath, "sample.xls");

            // メモリにすべて取り込む。これなら遅延でStreamにアクセスするような問題が発生しない
            byte[] fileBytes = File.ReadAllBytes(filePath);
            using (var readStream = new MemoryStream(fileBytes))
            using (var workbook = new HSSFWorkbook(readStream))
            {
                // Index番号を指定して削除
                workbook.RemoveSheetAt(0);

                // 名前を指定して直接削除はできないっぽい
                var index = workbook.GetSheetIndex("Sheet2");
                workbook.RemoveSheetAt(index); // 名前→Index番号→Index番号で削除

                // あらためて書き込み用としてStreamを開く
                using (var writeStream = new FileStream(filePath, FileMode.Create, FileAccess.Write, FileShare.None))
                {
                    // 書き込み
                    workbook.Write(writeStream);
                }
            }
        }
        catch (Exception ex)
        {
            Console.WriteLine(ex.Message);
        }
    }
}
□xlsx
using NPOI.XSSF.UserModel;
using System;
using System.IO;
using System.Reflection;

namespace SampleCode; // C#10~

internal class SampleNPOI_xlsx
{
    static void Main(string[] args)
    {
        try
        {
            // 実行ファイルのあるフォルダパス取得
            var folderPath = Path.GetDirectoryName(Assembly.GetEntryAssembly()?.Location);
            if (folderPath == null) { return; }

            // Excelファイルパスを作成
            var filePath = Path.Combine(folderPath, "sample.xlsx");

            // メモリにすべて取り込む。これなら遅延でStreamにアクセスするような問題が発生しない
            byte[] fileBytes = File.ReadAllBytes(filePath);
            using (var readStream = new MemoryStream(fileBytes))
            using (var workbook = new XSSFWorkbook(readStream))
            {
                // Index番号を指定して削除
                workbook.RemoveSheetAt(0);

                // 名前を指定して直接削除はできないっぽい
                var index = workbook.GetSheetIndex("Sheet2");
                workbook.RemoveSheetAt(index); // 名前→Index番号→Index番号で削除

                // あらためて書き込み用としてStreamを開く
                using (var writeStream = new FileStream(filePath, FileMode.Create, FileAccess.Write, FileShare.None))
                {
                    // 書き込み
                    workbook.Write(writeStream);
                }
            }
        }
        catch (Exception ex)
        {
            Console.WriteLine(ex.Message);
        }
    }
}
□xlsもxlsxも扱う場合
Program.cs
using System;
using System.IO;
using System.Reflection;

namespace SampleCode; // C#10~

internal class SampleNPOI
{
    static void Main(string[] args)
    {
        try
        {
            // 実行ファイルのあるフォルダパス取得
            var folderPath = Path.GetDirectoryName(Assembly.GetEntryAssembly()?.Location);
            if (folderPath == null) { return; }

            // Excelファイルパスを作成
            var filePath = Path.Combine(folderPath, "sample.xlsx");

            var extension = Path.GetExtension(filePath);

            // メモリにすべて取り込む。これなら遅延でStreamにアクセスするような問題が発生しない
            byte[] fileBytes = File.ReadAllBytes(filePath);
            using (var readStream = new MemoryStream(fileBytes))
            using (var workbook = WorkbookFactory.Create(readStream, extension))
            {
                // Index番号を指定して削除
                workbook.RemoveSheetAt(0);

                // 名前を指定して直接削除はできないっぽい
                var index = workbook.GetSheetIndex("Sheet2");
                workbook.RemoveSheetAt(index); // 名前→Index番号→Index番号で削除

                // あらためて書き込み用としてStreamを開く
                using (var writeStream = new FileStream(filePath, FileMode.Create, FileAccess.Write, FileShare.None))
                {
                    // 書き込み
                    workbook.Write(writeStream);
                }
            }
        }
        catch (Exception ex)
        {
            Console.WriteLine(ex.Message);
        }
    }
}
WorkbookFactory.cs
using NPOI.HSSF.UserModel;
using NPOI.SS.UserModel;
using NPOI.XSSF.UserModel;
using System;
using System.IO;

namespace SampleCode
{
    public class WorkbookFactory
    {
        public static IWorkbook Create(Stream stream, string extension)
        {
            extension = extension.ToLower();

            return extension switch
            {
                ".xls" => new HSSFWorkbook(stream),
                ".xlsx" => new XSSFWorkbook(stream),
                _ => throw new NotSupportedException("対象外の拡張子です")
            };
        }

        public static IWorkbook Create(string extension)
        {
            extension = extension.ToLower();

            return extension switch
            {
                ".xls" => new HSSFWorkbook(),
                ".xlsx" => new XSSFWorkbook(),
                _ => throw new NotSupportedException("対象外の拡張子です")
            };
        }
    }
}

